


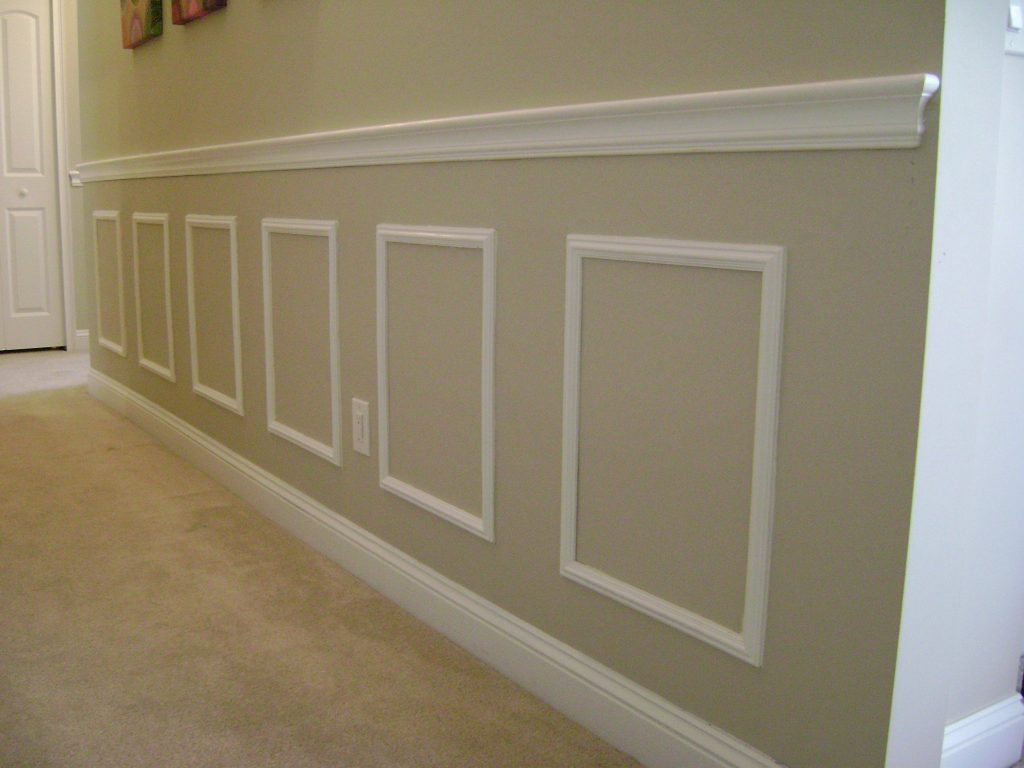
When you own a home, the freedom to decorate is something that many people embrace whole-heartedly. When you look at a room, the design isn’t set in stone. You can remove walls if you want to, build custom cabinets, or put in columns. You can also set your inner interior designer free by choosing decorative architectural finishes. These finishes include moldings, ceiling medallions, brackets, and more. They are usually anchored directly to the drywall of your walls and ceilings to provide the support for mounted architectural finishes.
Any home with drywall can support architectural finishes, provided the drywall itself is strong enough to do the job. Dry, sturdy drywall can be counted on, but not all drywall is 100% when you start. If there are old installation holes, cracks from the house settling, or if the drywall has taken moisture damage in the past, you may need to take a few steps to repair your drywall in order to protect it before installing architectural finishes and fixtures.
Protecting Your Drywall Before Fixture Installation
The reason drywall preparation is important is to protect it from the weight of your architectural finishes. And to protect the finishes themselves. If you install a long or heavy architectural finish on weakened drywall, the drywall can crumble, which is bad news for your installation and for the drywall. Drywall that crumbles away from previous damage or from moisture softening will not be able to support your installation and may need to be completely replaced before you can proceed.
Previous Drywall Damage to Look For
There are four types of drywall damage that you’ll want to check for and repair in order to prepare for your architectural finish installation.
-
Old Nail or Screw Holes
-
Larger Drywall Holes
-
Drywall Settling Cracks
-
Soft Water-Damaged Drywall
1) Fill Previous Installation Holes in Your Drywall
Start by looking for small holes in the drywall where other things have been previously installed. Picture frames, bookshelf anchors, artwork, and shelving all create holes in the drywall that might conflict with the new holes you need to punch. Check the entire area where you plan to perform the installation and the drywall sections surrounding or beneath that area as well.
These previous holes are sometimes difficult to spot. Run your hand over the drywall and look for dark spots that are bigger than the tiny shadows created by the wall texture.
How to Repair Small Drywall Holes
Supplies
- 2-4″ Putty Knife
- Jar of Spackle
- Sanding Sponge
Small holes in your drywall that were previously used for nails, screws, or removed drywall anchors are very easy to fix. Your drywall will be good as new with just a small application of spackle or a few layers of joint compound, whichever you have on hand. Most people use spackle for small holes because it contracts less as it dries, so you only need one application to fill and mask a drywall hole completely.
1. For each small hole, dip a corner of your putty knife into the spackle and get a small amount, then press the spackle into the hole and make sure that the hole is filled completely. Scrape the putty knife onto your spackle container, then use the flat edge to remove excess spackle and feather out any bumps so that it blends with the wall surface.
2. Use a quick circular swipe of the sanding sponge to smooth out any ridges in your spackle application.
3. If you have a long row of holes from a previous installation, you can also apply a long swipe with a putty knife full of spackle. Then remove the excess spackle and smooth out the result.
4. Give the spackle 24 hours to dry completely before proceeding on to the next step, which is probably painting. We’ll talk about painting at the end, because it is the final step before installing your architectural finishes.
2) Patch Larger Drywall Holes
Larger holes in drywall are a bigger problem and will require more than a dab of spackle to repair. If there is a hole in your drywall near where the architectural finishes will be installed, you’ll need to perform a complete and thorough repair before you can begin the installation. This hole will not only prevent you from properly anchoring your fixtures, it will also weaken the structural support offered by the rest of the drywall nearby.
Holes in your drywall are bad news for other reasons as well, like losing AC/Heat through the hole, exposure to insulation dust, and moisture concerns. It’s vital that you repair all nearby holes in the drywall before you begin the installation of architectural finishes.
How to Repair Larger Drywall Holes
Supplies
- Mesh Drywall Patch Kit
- Drywall Compound with Primer
- Putty Knife Set
- Exacto Knife
- Drywall Mud Tray (optional)
Drywall holes between thumb-sized and dinner-plate-sized can be repaired with a mesh drywall patch and primer putty. Essentially, you will be smoothing the hole, putting the mesh patch over the hole, then spackling the patch until it blends perfectly with the rest of the drywall.
1. Start by cleaning up the hole in your drywall. Knock off any crumbling bits of drywall and cut away the torn paper so that the hole is as clean and smooth-edged as possible. You want to get rid of any ridges or potential mess.
2. Place the mesh drywall patch over the hole. Make sure to get a patch that covers the entire area or two patches side-by-side can cover the area. Then add your first layer of putty. The putty can be spackle with primer or all-purpose drywall compound with primer. Use your widest putty knife to really slather on the putty and stick the patch to the wall. Completely cover the drywall patch and anchor it firmly to the wall with putty.
3. Use the putty knife to scrape away excess putty and feather it out into the wall. The goal is to minimize the bump and to perfectly blend the edges, so there are no ridges marking the difference between wall and repair putty.
4. Allow the putty to dry for 24 hours.
5. Use your widest putty knife to scrape any irregularities on the surface and knock away putty ridges from the original application. Then use a sanding sponge in a circular motion to help smooth and blend the feathered edges with the drywall.
3) Repair and Reinforce Drywall Settling Cracks
Drywall is installed when a home’s foundation has recently been laid. However, over time, a house will shift and settle. The framing will settle, and the foundation will settle slightly unevenly into the ground. If the house settles even a small fraction of an inch, the drywall is likely to crack along door and window frames and along drywall seams. This kind of settling crack is natural, unavoidable, and more likely in regions with clay-rich soil.
A settling crack most often looks like a diagonal crack reaching from a corner of a window or the top of a doorframe. However, they can happen anywhere and are sometimes straight cracks along the seams of the original drywall panels. Cracked drywall cannot be relied on to support your architectural finishes, so the cracks will need to be properly repaired and reinforced before you can begin.
How to Repair a Settling Crack
Supplies
- Mesh Drywall Tape
- Drywall Joint Compound
- Putty Knife Set
- Sanding Sponge
Repairing a crack in drywall is easier than you might think. This is a serious repair, but not a difficult one. Essentially, you will be patching the crack much in the same way you would patch a hole, only in a long strip using reinforcing mesh tape instead of a large square of mesh. The mesh drywall tape and joint compound combined will bind, reinforce, and hide the crack.
1. Lay a very thin covering layer of drywall joint compound over the entire length of the settling crack using a 4-8 inch putty knife. The term is to embed the drywall tape so you will be putting compound underneath and on top of the tape as you lay it. Make sure the foundation of joint compound is thick and wet enough to be sticky, but not too thick. The putty will both fill the crack and hold the drywall tape in place.
2. Carefully lay the drywall tape in a line, trying to center the crack underneath it even though you can’t see the crack anymore. If there is an area where there is no putty under the tape, add a little more compound underneath to help it stick. Push the tape into the compound, so it lays as flat and close to the wall as possible.
3. Add another layer of joint compound over the top of the tape. Just like the hole patch, you’ll want to cover the tape completely in joint compound, but only as thick as necessary.
4. Scrape away excess joint compound, then feather the edges so that it blends well with the wall. Scrape outward in wide strokes to cause the joint compound to spread thinly until it tapers to nothing on the wall. Don’t worry about covering a wide area; you’ll be repainting soon.
5. Let it dry for 12 hours, then apply a new layer. You may want to add two or three very thin layers after drying periods before the patch is completely finished.
4) Replace or Patch Soft Drywall Sections
The last kind of damage to look out for is a soft area of drywall. This kind of damage is often not visibly apparent, but it can happen anywhere that moisture has been allowed to infuse the drywall. When drywall is soaked or constantly moist, the gypsum and paper soften and begin to sag. Soft drywall crumbles when impacted instead of holding strong, which means it absolutely cannot support the mounting screws for architectural finishes.
Lightly probe and knock on your drywall everywhere you plan to install, especially in bathrooms, kitchens, and laundry rooms where built-up moisture is most common. If you find a soft spot, you’ll need to replace the drywall in that section before it is structurally sound enough to support fixtures or finishes.
How to Repair Soft Drywall
Supplies
- New Panel of Drywall
- Drywall Saw
- Drywall Mud and Joint Compound
- Putty Knife Set
- Sanding Sponge
- Drywall Nails
Soft drywall cannot be repaired the same way holes and cracks can be repaired. The structure of the drywall itself is compromised so you’ll need to fully replace the drywall that was damaged with new cut panels of drywall. Unless you are already experienced at working with fresh-cut drywall, you will likely want to hire professionals to remove the moist patches and install new drywall panels that are not damaged. Then take steps to protect your drywall so it does not become moist again.
1. Identify the soft drywall areas. Use a pencil, chalk, or marker to indicate the areas that are soft to the touch. This is an important step to know how much drywall will need to be replaced and protected.
2. Cut out the moist drywall, out to the closest stud if the area is larger than a dinner plate.
3. Measure a new section of drywall of the correct thickness (probably either 1/2″ or 3/4″) and cut it exactly.
4. Mount, nail, and mud-in the new drywall panel. This process is worthy of its own instructional article, or you can rely on the expertise of an experienced drywall repairman to do the job quickly with precision.
5. Increase ventilation in the room and use waterproofing paint primer when you repaint that section of wall.
5) Repaint the Wall
The final step is to repaint the repaired area so that the room looks perfect when you finally install your architectural finishes. You know how to repaint a room, but there are a few final helpful pointers we can offer to best prepare and protect your wall before the installation.
Retexturing the wall doesn’t have to be difficult. There are spray-on wall textures that can transform your putty-smooth section of wall into a similar texture to the rest of your wall. Simply spray, let dry, and get to painting. A paint store expert can even help you match a photo of your wall texture with the right texture spray.
Start with a waterproofing paint primer, especially if you are installing in the bathroom, kitchen, or an area where laundry is done. Any room that sees significant indoor moisture can be protected from future soft spots with waterproofing primer.
Lastly, match your finishing paint with the rest of the room. Or take this opportunity to completely repaint the room or create an accent wall if that would better suit your decoration plans. If you do completely repaint the wall or room, consider a sturdy washable satin or semi-gloss that also provides some amount of waterproofing.
Install Your Architectural Finishes
Once your walls are entirely repaired, primed, and painted, you are finally ready to install your architectural finishes. From molding to medallions, your walls are sturdy, beautiful, and prepared to support any finishes you care to install. Ready to get started or looking to explore your options in architectural finishes? Contact us today to plan the perfect decorative upgrades to your home.